Destiny 2 - Nightfall SOLO Guide (Exodus Crash)
Posted in
destiny
Exodus Crash is certainly the most hated of the Destiny 2 strikes and the Nightfall version just compounds that misery further. Offering a glimmer of hope, this guide provides a strategic walkthrough for SOLO players who are brave enough to attempt a SOLO run on Exodus Crash.
As before, the Nightfall comes with a set of modifiers, each one affecting your overall strategy as you attempt to keep the clock ticking and somehow get rid of the highly annoying Vandall BOSS at the very end.
So let's get straight to it and provide some light at the end of the tunnel...
Modifiers

- Rotation 1: Attrition and Anomalies
- Rotation 2: Prism and Timewarp Rings (starting 17th Oct)
Attrition
A new modifier that provides a Yin and Yang principle:
- 1. Shield and health regeneration times are seriously restricted.
- 2. "Wells of light" drop following kills, recharging your Super and health when collected.
Players must be careful to pick up the wells of light (white orbs) before dashing into the next fight with next to nothing on the health bar. Be quick though, health orbs disappear after a few seconds.
Anomalies
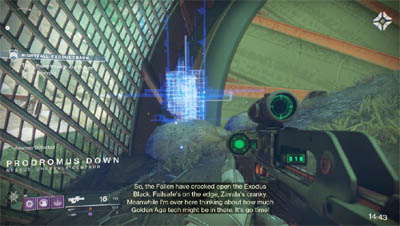
Another new modifier that behaves in a similar manner to rings. Players must find and shoot these anomalies to add a 30 second boost to the clock timer. Anomalies appear as crystal lattices, much like the ones you interact with on Nessus during Adventures or Oracles from the Vault of Glass..
Look for the text message that states "anomaly detected" in the bottom left hand corner of the screen. Anomalies do
not disappear after a set timer and they all spawn into the area simultaneously.
It's absolutely essential that players find and shoot all Anomalies in each of the sections where they appear to build up enough of a timer for the final BOSS.
Prism
Rotation 2The infamous rotating burn modifier that cycles through each of the elements (Solar, Arc and Void) every 30 seconds. When an elemental burn is active, weapons and class abilities with the matching element type deal more damage. Incoming damage is NOT effected by this modifier.
When Prism is active, players should always attempt to match the elemental burn, even if that means going against an enemies shield type or for a less favourable weapon.
Timewarp Rings
Rotation 2Physical "hoops" that players must jump through to top up the clock. Jumping through the first ring in an area will spawn additional rings that players can jump through. Warning, although the first ring never despawns, the subsequent rings do. Ensure that you're quick to successively jump through all hoops in an area before moving on.
A good tip is to leave the first ring alone until the objective is complete or the room is clear of enemies.
General Strategy
Class
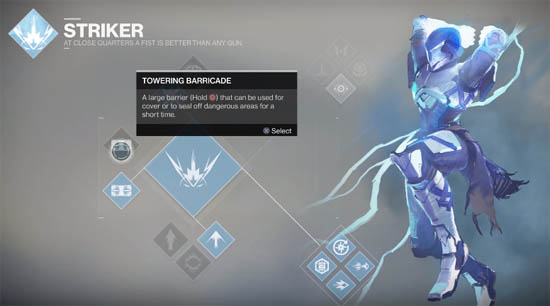
This is easily the hardest Nightfall in Destiny 2 and players must accept the hard facts that certain classes are better than others during SOLO encounters. I covered this briefly last week when I mentioned the Titan class and it's protective barricade. The Titan still has a great all round class and the barricade shield once again proves to be a SOLO players best friend.
When Attrition is active:Voidwalkers have a great advantage when Attrition is active. It plays straight into the hands of the "Attunement of Huner" skill path and Healing Rifts. Since shields and health regen at an amazingly slow pace, choosing the Voidwalker subclass with the Devour option is a smart move. Whether you choose to drain your grenade or perform an elemental melee, the Devour subclass perk lets you continuously top up health so long as you're constantly getting kills (within the 9 second window). With so many Dreg's and other small time mobs, it's easy to top up the Devour timer consistently.
Hunters you have the hardest challenge to be honest. Your best bet is to go loaded with Golden Gun and the Celestial Nighthawk exotic if you have it. With this combination and the bonus of Attrition Super top-tops, you can use your Super often and even reduce the final bosses health by a third in one go!
When Prism is activeFor once, Hunters have a great subclass for the Prism modifier in the form of the "Gunslinger". Combining the Golden Gun Super with the Celestial Nighthawk exotic and timing things perfectly for the Solar Prism burn players can lay waste to the final BOSS very quickly.
Striker Titans can also wreck havoc during Arc Prism burns thanks to their "Code of the Earthshaker" skill path that provides double grenades. Pulse grenades are still the best option of the group offering extreme power and coverage.
Weapons
There are countless guides on the best weapons in Destiny 2 but they all share something in common. In total there are roughly 5 perks (or traits) that make a weapon stand out from the rest. With no random rolls, players can reliably "hunt" for each of these weapons by focusing on a particular vendor or activity.
Recommended perks- Rampage - the perk that adds a damage multiplier for successfully killing enemies. Stacks up to three times.
- Explosive Payload - explosion rounds, perfect in PvE.
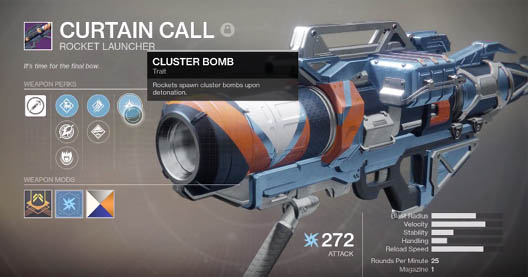
- Cluster bombs - only available on Rocket Launchers, these provide additional damage on top of the initial blast.
Examples of great weapons:- From Zavala/Strikes - Nameless Midnight Scout Rifle (Explosive Payload)
- From Shaxx/Crucible - Better Devil's Hand Cannon (Explosive Payload)
- From Zavala/Strikes - Curtain Call Rocket Launcher (Cluster Bombs)
- From Devrim - Call to Serve Scout Rifle (Triple Tap, returns one round to mag)
- From Trials - Prosecutor Auto Rifle (Great Accuracy)
Recommended Weapon TypesI typically run Nightfall's with a strong Scout Rifle, MIDA is ok if you don't mind sacrificing the exotic slot but other "area of effect" Legendary versions such as Nameless Midnight are great. Hand Cannons come a close second, with Auto Rifles and certainly Pulse Rifles being a lower priority.
When Attrition is active:With no burn (Prism modifier) and very few shielded enemies in Exodus Crash, you should opt for an Arc Energy weapon. A Scout Rifle or Hand Cannon is great but even better is the Riskrunner exotic. This little beauty will chain arc lightning to nearby enemies and even return ammo. Although an SMG, enemies are nicely bunched together during most encounters making Riskrunner a very smart choice indeed. Furthermore, combine Riskrunner with Voidwalker and the Devour perk and you're going to be laughing all the way to the BOSS fight.
When Prism is active:If Prism is included on the modifiers list then the most important rule is to spread your elemental damage types between Energy, Power and class abilities. For example, if running the Gunslinger Hunter (Solar class) then back this up with an Arc Energy and Void Power Weapon. This allows you to swap between different weapons and class attacks to always stay in sync with the active element (Solar, Arc, Void) for maximum damage at all times.
I strongly recommend the Riskrunner SMG again for the Energy slot simply because most enemies use Arc damage to attack you. When hit by Arc damage, Riskrunner will not only increase in power but also go into chain lightning mode which literally obliterates everything nearby.
For the actual type of Power Weapon the choice is open on this Nightfall. Whilst Rocket Launchers are traditionally the best, offering long range and high damage, players should really consider using a Sniper during the Ghost encounter and even the sword towards the end of the Nightfall. Yes I said that, the sword! The BOSS Thaviks is particularly hard to DPS and the sword offers a perfectly reasonable option for high damage. If you're lucky enough to have a sword that regens ammo on rapid use then opt for that version.
Skipping Sections
This Nightfall doesn't have any sections which can be skipped.
Quick Section by Section
1. Track Fallen through Arc Pulses
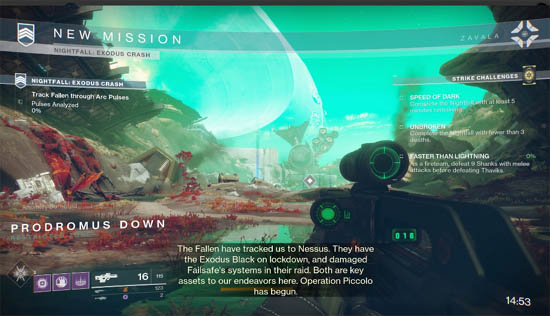
Acting much like a mini-patrol area, the beginning of the Nightfall requires you to collect the Arc Pulses by standing inside the many bright beams. This first section is full of small ads with long range and annoying homing missiles.
Play them at their own game by using a long range Scout Rifle to pick off vandals and shanks as you work your way through the opening section. Stay well back and you'll soon learn that each mob has a set area that they cannot leave. Remain outside their boundary and it's easy pickings.
For the Pikes just bulldoze your way through with grenades or rocket launchers to get the job done quickly. No deaths should be acceptable in this section.
Take time to browse left, right, up and down to find all of the Anomalies (or Rings depending on modifier). Roughly speaking there should be at least 9 Anomalies before you complete the "Defeat the Fallen" phase. Check inside the ship debris, around the rock edges, down below by the waterfall and so long as the "Anomaly Detected" message appears then you still have some to find.
By the end of this section you should have built up at least 12-13 mins on the clock when Anomalies is active or around 15-16 mins if Rings is active.
2. Reach the Exodus Black's Aft
![Reach the Exodus Black's Aft]()
Push through into the smaller rooms and clear the mines and small enemies here. Note, some Anomalies are present in these small rooms. Check above your head, in the tree and under the stone arch.
Don't be tempted to use your Super or Power Weapon ammo here, save it for a little later when the two Servitors appear.
3. Analyze the Fallen Device
![Servitor]()
Now begins a defend the flag style event which starts by deploying Ghost. This section is split into 4 smaller segments with waves of enemies during each phase. It's a real time eater so making good progress here will either make or break your Nightfall run.
You have two choices for this section: either clear the room and return to Ghost during each phase; or attempt to stay by Ghost and defend as the progress percentage increases. The first option is safer but slower whilst the second is more dangerous but obviously faster.
Depending which class you run, this strategy will differ. For example, Titan's with Barricade can be braver - holding the area behind the protective shield. Voidwalkers can also go head first, ramping up the Devour perk with some lovely melee attacks that constantly recharge health and grenades.
If you do prefer to play it safe, make good use of the stairwell leading into the room as the fallback position where ads cannot hit you. It's a good safe spot to easily snipe at enemies using a Scout Rifle, throwing well timed grenades when appropriate. It's a short dash to ghost to push the progress bar a little further before the next wave comes in.
When the time comes to destroy the two Servitors, unleash all of your Power Weapon ammunition and follow up with a Super for good effect.
The clock will tick away quickly here so it's important to get this section done with 7-8 mins left on the timer when Anomalies is active, or 10-11 mins if Rings is active.
4. Track Fallen through Arc Pulses and Defeat the Fallen Walker
Another process of collecting the Arc Pulses. Nothing too difficult here, grab a Pike for a little later and when faced with the Fallen Walker simply dodge side to side as you inflict the necessary damage and conserve your ammo. These two sections shouldn't take longer than a couple of minutes.
There are NO anomalies or rings here.
5. Explore the Exodus Black's Aft
Another much needed opportunity to collect Anomalies or Rings to top up your timer. There are roughly 9 Anomalies or rings in this very dark section, glowing like Christmas tree lights. Collecting enough of them should buy you at least 4 mins of extra time. Enemies are rather easy too, just go armed with an Arc energy weapon for the Captains and you should be fine.
No matter which modifier is active, aim to have around 11-12 mins on the clock for the final BOSS fight.
6. Defeat Thaviks the Depraved
![Thaviks the Depraved boss fight]()
Clear the area of small mobs and the final BOSS fight commences.
Thaviks is one hell of an annoying BOSS who loves to disappear for far too long. For this reason, you must hope that you've built up a pretty substantial clock for the fight.
The rules are simple enough...
Whenever Thaviks appears, jump on top of a box or pillar and unleash your Super or Power Weapon, then wait for the next opportunity. While he's invisible, stay within the central circular area and focus on any immediate threats (Marauders, Dregs, Servitors etc) whilst collecting light wells for a Super meter top-up.
When immediate dangers are gone, concentrate on the Overcharge Shanks that are spread around the perimeter of the area near the charging stations. Killing these does nothing substantial so always leave for last.
Thaviks has a fairly harmless gun for the first portion of health and then he switches to melee blades for the second half. As long as you stay above ground and out of his reach then he can't harm you. Hop on and off your platform to tempt him closer each time. If running a sword Power Weapon, utilise the heavier strike option to stagger and prevent Thaviks from going invisible too quickly. When appropriate, fallback to above ground or behind pillars for safety.
Tip: If Prism is active, learn to countdown each of the elemental changes (30 seconds) so that you can almost predict a change of element (Solar, Arc, Void) and the appearance of Thaviks at the same time. Predicting and matching the burn correctly will help you deal massive damage thus making the BOSS fight that much easier.
Repeat the process of clearing ads and damaging Thaviks until the job is done. Good luck...you'll need it!!
Safe Spot: There appears to be a safe spot in the far northwestern corner of the boss room (assuming north is straight in front of you as you enter). Jump on the tarps and slip down behind and onto the pipes. Thaviks can't reach you here so crouch behind the pipes and you can safely Scout Rifle at his head.
Unconfirmed Cheese: There are unconfirmed reports that players can shoot Thaviks when he is climbing the outer walls (whilst invisible), if you can spot him that is. He falls off and dies instantly, ending the strike and rewarding you with loot.