Black Ops 2 Origins - Solo Strategy for High Rounds
Posted in
black ops 2
Origins has to be one of the best zombie maps from the Black Ops series so far. The map is particularly good for solo players thanks to the wealth of guns, wonder weapons, perks and the overall unique elements which make for a really solid solo game. Although rather daunting on launch day, the Origins map has some great open spaces with potential for long trains and some really high rounds.
What we like about Origins is the robot and panzer elements. The robots break up the paths nicely, forcing you to think carefully about your next move and they remove the repetitiveness of those later rounds. The Panzer is also a great BOSS zombie - not too annoying and great to fight against.
In this strategy, we'll be focusing on point acquisition in the early rounds and setting yourself up. Then moving onto the awkward rounds when you're the most vulnerable and eventually shifting to those wonder weapons and getting to the high rounds. As with all solo strategies, we'll give tips on building a safety net and what to look out for to avoid an abrupt end.
Rounds 1-5
Probably the most important part of your solo strategy, get these rounds wrong and you'll find it hard to correct the mistakes when you're under pressure later. During these rounds, you must maximise points - that's all you need to worry about.
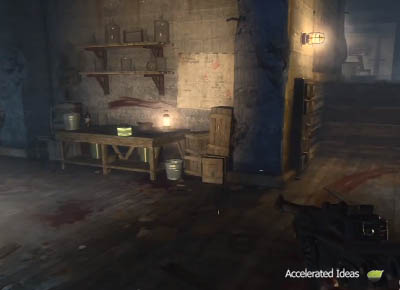
During Round 1, you want to make the most of that double points reward for turning on the Generator. So immediately turn on the Generator and fend off the knight zombies, the double points reward will pop out of the box. Wait for zombies to break through the barriers and then pick up the Double Points.
Now use a combination of pistol shots (x8) and knife attack to gain at least 2200+ points. Make sure you pick up the Maxis Brain for the drone and shovel for digging before the end of the round.
As soon as Round 1 is over, drink Quick Revive (to give you the first safety net) then head out the door near the generator. Dig up any rubble to pick up Zombie Blood or points, and head through the second door leading to the next Generator and the Tank Room.
Buy the MP40 for 1300 points - this is a solid gun and it'll see you through to round 7. Pick up the Blue disc, we'll use this later. During Rounds 2-5 build up enough points to buy your way through to the Excavation Site - this is 2250 points. Use the Double Points and Max Ammo drops wisely to increase and save points - avoid the Nuke entirely.

Leave one final zombie on round 5 to give you more time to explore the Excavation site. Keep the zombie close to avoid ending the round, but leave him far enough behind so when you dig up piles the grenades don't finish him up. Search the excavation site for bonus rewards including Blood Money and if it's snowing - parts for the Ice Staff.
Keep the zombie alive and head towards the Jug Generator and turn it on. Avoid killing that zombie but feel free to kill the other knights until the Generator is charged. We can't afford Jug yet but at least it's ready for later.
Rounds 6-7
These are the crucial rounds where things either go to plan or go downhill fast. During Rounds 6 and 7, you want to build up enough points to buy Jug and save some cash for getting to the Tank and the STG-44.

We recommend staying on the Jug side of the excavation site and working circles around the Jug area, but not in the middle. So you start from the chest near Jug and work round the side, past the tunnel and back to the centre edge of the excavation site. This circle encompasses roughly half of the excavation site - one side of it.
Since it's only Round 6 and 7, you can avoid zombies easily and go for maximum points using the MP40. Remember to pick up any Double Points and Insta-kills BUT stay away from the Nukes as you'll lose tonnes of potential points. The only time a nuke is good, is if there's one zombie left and you're happy to finish the round. But in this case, we want to keep the last zombie alive.
If you find that you're building up points fast, buy Jug at the end of the Round 6 to make things a little safer. By the end of Round 7, you must have bought Jug and acquired at least 4000 points.
Keeping the last zombie close by, head through the barriers leading to the church and also through the barrier next to the Tank. Go upstairs and buy the STG-44 from the wall - this is going to help us get rid of the Panzer. Also pick up the second drone part from the No man's Land pathway (or tunnel).
Round 8

It doesn't matter what you're doing, once you reach the excavation site the Panzer Soldier (BOSS zombie) will appear during Round 8. If you're good at running circles round the excavation site then you can take him out here using the STG-44. Otherwise, hopping on the tank will make him fly away and come back later. Stay on the tank and take out the majority of the zombies (only leave 1), then when the tank stops it'll be just you vs Panzer - making things a lot easier.
Remember to pick up the Fire Staff part after killing the Panzer guy.
Rounds 9-11
We've got things on our side now - decent perks, well enough to provide a safety net, and we've got a decent weapon in the STG-44. Both our guns are wall weapons so we can easily refill between rounds and keep going. This is the big advantage of not using the box - you won't run out of ammo.
For the next few rounds, we want to focus on building a staff and increasing our perks. So get through the next round by running circles on the excavation site and leave that one last zombie alive. If anything goes horribly wrong and you're downed, remember to re-buy Quick Revive and Jug, nothing else.
In our experience, the Ice Staff is the best Staff to build early in the game. You've probably got one of the parts from the earlier rounds so it's just a case of opening more barriers and digging.
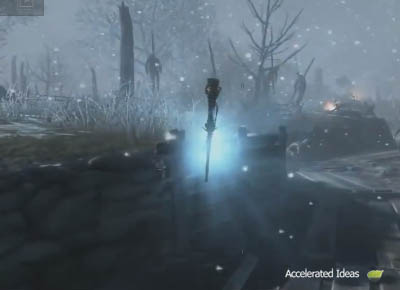
During Rounds 9 -12, look out for the weather changing to snow, keep the last zombie alive and go dig everywhere until you've got all the parts. Get the Gramophone, Black disc and final Drone part from the excavation site and make your way through the Blue portal which is behind the church. Grab the blue crystal, head back to the lower-level of the excavation site and build the staff. Once acquired, you'll find that the Staff is going to beat most box weapons for now - it's also a free wonder weapon!
Of course, you can't predict when it's going to snow so if you're looking for a good train location we recommend the Stamin-Up Generator. This is the Generator on the RHS when you first enter the excavation site. The half circle around this Generator is a great place to build up zombie trains.
If you've got the Ice Staff, you'll find that progressing through Rounds 9- 12 is a breeze BUT always try using the STG-44 as much as possible to maximise points.
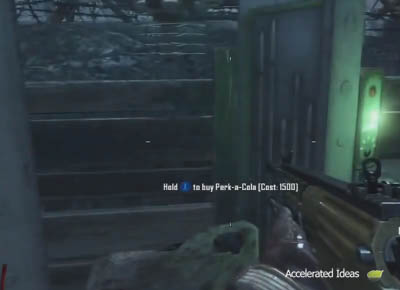
Once you've got the Staff and some decent points, leave a single zombie alive and head off to find the special Perk machine - the one which provides perks for 1500 points. You can tell if the special perk machine will be available because it'll show blue sparks before the Generator is turned on.
So, hunt down the Generator which will power the perk machine and turn it on. Buy yourself two new Perks but remember to make a note of which perk you'll get before picking it up. You want to avoid Electric Cherry and PhD Flopper - both have limited use on Origins. Ideally, you want to receive Double Tap, Deadshot or Mule Kick. Double Tap being the most important.
Rounds 12-15
By Round 12 it's time for the Panzer Soldat to appear again, but this time you should have little trouble killing him with the Ice Staff - just stay around the excavation site to give yourself enough room to manoeuvre.
Between Rounds 12 - 15 we want to achieve 3 things - building the Maxis Drone, Building the Fire Staff and making a 'point safety net'. The Points safety net is important to help us buy every Perk again should we get downed - it also gives an opportunity to pull out a Ray Gun from the box.
Again, it's worth staying near the Stamin-up perk machine and running circles. Alternatively, you can run circles around the entire excavation site, but be careful not to run too far in front of the zombies otherwise they'll just spawn again - ruining your train method.

First, get the Maxis Drone built. You should have all parts by now so just head to a workbench - preferably the one between the Tank Station and Excavation. Build the drone and save it up for the start of the next round. We're less worried about maximum points now and more worried about high rounds, losing points from Drone kills is unimportant so long as we stay alive. You'll find that the Drone won't be fast enough to clear your path so machine gun kills will still rack up the points.
It's best to launch the Drone at the start of a round so you get a decent amount of backup while the Drone still has power. You'll find the Maxis Drone is capable of taking out entire groups of zombies on his own - even at high rounds.
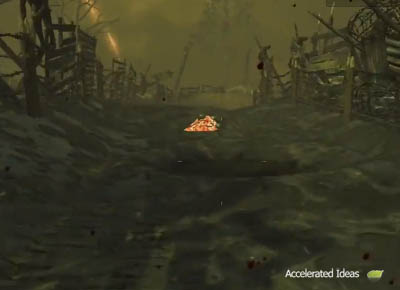
During these rounds, we also want to keep an eye out for Zombie Blood. Once acquired, search for red glowing dig sites and try to dig up the empty perk bottle (see image). This will be important for buying Speed Cola soon.
Between Rounds 12 -1 5 there's another tipping point and that's because zombies are going to get faster and stronger. We'll need a better weapon than the Ice Staff because frozen zombies can sometimes block our pathway. It's time to get the Fire staff!
Rounds 15-20
During Rounds 15 - 20 we need to turn on all remaining generators, build an alternative Staff and get Speed Cola.

You should have already collected the first part for the Fire Staff when you killed the Panzer Soldat (BOSS zombie) so we've got two easy parts to collect now. The second part for the fire staff is found inside the chest at Generator 6 (behind church) but you'll need to turn on all the generators for it to open. The third staff part is found by shooting down the plane from the sky - this is the plane which is on fire. When you shoot the plane, you must track where the part is falling and go pick it up.
Note: When you turn on the generators, remember to pick up the Speed Cola Perk and use the empty perk slot you acquired through Zombie Blood.
You're familiar with the build process now, so get the red disc near inside the church (or generator 6) and go build the Fire staff. It's one of the best Staffs and can literally incinerate zombies - this will make the higher rounds much easier.
Now you've got the best staff, good perks and Maxis Drone to help you out. It's time to pick the best train location and run those trains. Again, we recommend the excavation site, particularly around Stamin-Up. Use the robots feet to your advantage and squash entire groups while you weave between them. Also use the Maxis Drone on every round to take care of the majority of zombies. Combine those tactics with your new fire staff and you'll find it relatively easy to get to round 20.
Round 20+

By round 20, the sheer number of zombies makes it important to have a backup weapon besides the Fire Staff. Locate the box and use your large sum of points to pull out a Ray Gun (Mark II preferably). Run back to the Excavation site and immediately pack-a-punch it.
Alternatively, pack-a-punch the STG-44 and you'll have wall ammo as backup. It's up to you which you prefer.
A pack-a-punched Ray Gun (or STG-44) combined with the Fire Staff is perfect for rounds 20+.

Our Maxis Drone was proving very effective up until now but if you really want to creep towards the 30's then you're definitely going to need the Tactical Airstrike. A whole round worth of zombies can be destroyed with a single well placed Tactical Airstrike - saving you a lot of ammo and time. We're not going to cover that tactic here but there are plenty of YouTube videos for building the airstrike.
Apart from the tactics mentioned above, the essential tips below will help you too.. - Launch Maxis Drone every round
- Build up a long train (wait for all zombies to spawn) and unleash Tactical Airstrike
- Build the Zombie Shield for added protection
- Upgrade Fire Staff for more firepower
- Use 'charged' Staff attacks for groups of zombies
- Get Thunder Fists if you want a melee backup
- Get the Wind staff and upgrade it
- Keep digging for Zombie Blood and Max Ammos
- Refill wall weapon ammo at the end of every round
- Keep a minimum reserve of 30,000 points
- Leave last zombie to prepare for next round - more ammo, new gun etc..
- Avoid narrow pathways and stay away from No Man's Land - zombies will outrun you
- Watch Robot spawn areas and use to your advantage - stamping on groups of zombies
- Avoid crawlers on high rounds - they'll get in the way
- Keep digging to get the Golden Shovel and then the Golden Helmet to avoid getting stomped by robots
- Get 115 headshots to get a free pack-a-punched Assault Rifle
- Collect your free perk when you've spent 30,000 points